Tuesday, July 26, 2011

Green Tea Party

A few months ago, before painting 2 walls of our master bedroom a neutral beige, I had actually put up quite a few of different green color paint chips in order to see if I liked any of them.

I got scared of going "crazy" and went with the neutrals. Then a few weeks ago my free Glidden quart arrived. The color, Soothing Green Tea, I actually quite liked. So before starting any big projects with the paint I decided to "test the waters" and just paint the inner portion of our old TV stand.

And what I saw I really liked. So much so, that I made some artwork with it (more on that another day). Then today when my son fell asleep for his nap, I figured why not and painted the remainder walls of our master bedroom.

Here are the before-pictures:


And now here are the after-pictures:

Here is a close-up of the wall color:

I love how this turned out. The color is a soft green that is cheery at the same time.

Painting the closet wall and plus the small adjoining wall to the right took me about an hour. Since my son was still sleeping, I figured I might as well also finish up the two walls in our master bathroom that had remained unpainted.

The first two walls were already painted in lime light (a very light blue with a hint of green) and two walls were still the builders beige that comes with new houses. So I used the prolonged nap of my son and also painted the remaining master bathroom walls in Green Tea (the color actually works pretty good with the existing color scheme).

Here are the before-pictures of the blank walls (you can see the blue on the left wall):


Ready for these afters?


So what do you think of my Green Tea Party? My son actually woke up while I was just about to finish up, so I had to hurry.

Either way, I love how this turned out. Especially in the bathroom. I have caught myself looking at the cheery color on the walls and I am glad I tried painting a wall green.

This color for sure stays on my list of favorites.

Monday, July 25, 2011

Magenta and Navy Nursery

I woke up today and found a beautiful flower from our landlord's yard next to my bed. The hubby must have taken seen it, while taking our dog for a walk earlier.

While looking at it, I noticed how beautiful the color of the flower went with our dark blue duvet.


And guess what? Right away my brain went into mood board thinking.

I thought that magenta and navy would be great colors for a girl's nursery, so that's what I worked on.
Take a look at my mood board and let me know what you think:


1. I would paint most of the walls in a very light gray tone, such as Glidden's Polished Pewter or Amethyst Haze. Then I would create an accent wall in magenta pink (maybe Glidden's Bight Black Raspberry). You could also paint some kind of striped detail across the gray walls using our two main colors.
2. In order to go budget-friendly, I would try to find a dresser with great bones on Craigslist and then paint it in navy. The crib and a shelving unit (such as the Expedit) could be purchased in white or if second-hand painted white.
3. For the shelving unit I would use cute magenta and navy colored accessories, such as baskets. You could also use pretty paper or fabric to cover the back of the shelf.
4. A dark gray arm chair with magenta foot stool would look great and provide additional seating.
5. Then I would add white floating shelves to the wall, white curtain panels, and a wooden alphabet in white or in shades of our colors. A picture gallery with only white frames would also look great.
6. Three canvases (similar to the ones in the mood board), accent pillows (maybe DIY?), and paper lanterns high above the crib would add some more decorative touches to the room.
7. For the bedding, I would also use a combination of fun gray, magenta and navy fabrics and try to sew this myself.
8. A navy colored rug completes the board.

To me, this seems to be a color-scheme that is girlie, but not too much.Thank you landlord for such a great inspirational piece right from your backyard!

Linked up here:

Centsational Girl - Garden Link Party

Summer Fruit Cake

Do you remember the delicious art work I posted about the other day? One of the cards was a very easy recipe for a peach cake, which I tried out (slightly altered) over the weekend.


You only need a few ingredients:

- A yellow cake mix (which usually required 2 eggs or so)
- Fruit that is in season right now (peaches, berries, etc)
- Heavy cream
- Confectioners sugar

Here is what you do:

1) Prepare the yellow cake following instructions on the box (you can also make this yourself). I lined a cake pan with aluminum foil in order to be able to remove my cake in one piece.
2) Let cool and cut cake in half.
3) Whip up a good amount of whipping cream with a bit of sugar and confectioners sugar.
4) Cover first layer with sliced fruit (I used pears, since I had them on hand)


4) Spread whipped cream over the fruit:


5) Add second layer of cake and second layer of fruit (make sure to put some fruit aside for decorating):


6) Go ahead and decorate the whole thing with remainder whipped cream, remainder fruit and cinnamon:


7) Put your cake in the refrigerator for half an hour or so, and then enjoy a slice with coffee or tea:


Sunday, July 24, 2011

Meal Plan Sunday - 7/24/2011

Here is what I have planned for meals for this week:


Breakfasts:
Oatmeal w/Fruit
Cereal w/Fruit
Toast, scrambled eggs
Homemade waffles, fruit-smoothie


Lunches:
Leftovers (x 3)
Toast w/ Peanut butter
Salad
Pasta Soup w/Veggies

Dinners: 
Baked Potatoes and Zucchini, Pork Ribs
Carrot-Rice, Beans, Chicken
Pasta, Side Salad, Chicken
Pasta with Veggie-Bolognese-Sauce
BBQ, Rice, Tomato-Green-Pepper-Vinaigrette
Leftovers
Leftovers


Saturday, July 23, 2011

Goodwill and Craigslist

I guess my weekend started out pretty good. Late yesterday night, I went through mine and my hubbies closets, sorting out about 5 big bags of clothes, never used bed linens, bed skirts and similar items.

It is so nice to look in the closets and everything is organized so nicely. Whenever it gets too messy in there, I know it's time for reviewing.

Anything we haven't worn in a year gets either donated or tossed (if the condition isn't good enough for donating anymore).

Usually what I do is I just throw items of one category on the bed, and then I look at everything closely. If something was worn recently it stays, and I put it back into the closet on a neat pile. If it wasn't worn, well then it goes "bye-bye" (in the words of my son, who says bye to everything).  Then I move on to the next category and repeat the whole process.

As I mentioned, last night's closet clean-up resulted in 5 big bags of stuff. So today after breakfast my son and I went to Goodwill to donate everything. My plan was to take the time and go through the store. I had read so much about Goodwill but never went there myself. I wanted to go through all the stuff to find treasures and tables full of hidden potential.

Unfortunately, that didn't happen. Instead right when I entered the store I got a call, which went like this:

"Hi, I saw the Ikea chair you posted on Craigslist. Can I come now and take a look at it?"

me: "Sure."

So I hurried to hand over my donations, and then back to my house to meet with the potential buyer for a chair I had posted about a month earlier. Instead of buying something at Goodwill, I ended up selling my first item ever on Craigslist.

I not only emptied my closets of 5 bags full of stuff, I also sold a chair and footstool which were taking up way to much space in our narrow apartment. I am one step closer to getting our apartment more livable and organized.

And I'll go back to Goodwill another time, especially since the one glimpse I got at the sales area was actually really positive.

Friday, July 22, 2011

Delicious Art

The other day I got the first two issues of the Martha Stewart Living Magazines that I had "purchased" with my Recycle Bank Points. Soooo many delicious recipes in there!  I loved the small insert cards in each issue with a few recipes.


Those would make some great wall art don't you think? I picked out a few cards that really seemed to work together, grabbed some frames and assembled my no-cost wall art.


What do you think?


Not bad for free art, right? For a lack of wall space in my kitchen I added these to one of my dining-room shelves, but I could imagine something like this on a spare wall in the kitchen.

Next time you get a hold of free recipe cards (in the supermarket or a magazine), put them to use.

Thursday, July 21, 2011

Pattern overload?

For the longest time I did not like strong patterns, such as zebra, chevron, diamond or similar prints. How could something that hurts the eye when looking at it look good? I just couldn't understand it.

Then one day while browsing around for cute slipper chairs, I found this one and I actually really liked it:

Weird. I never liked zebra prints:

So how come? I soon started realizing that my opinion with regards to patterns seemed to shift. I actually like them as along as the color-scheme is toned-down and very low contrast.

Take for example the zebra pattern in the chairs above. I like the zebra pattern of the first chair because the beige on beige makes this a low-contrast and toned-down version of the normally high-contrast pattern (as in the second chair).

Here is another example:
 (found here)

The black and white chevron pattern used on this rug is very strong and high contrast. Too much for my taste. Now look at the rug below:


(found here)

This one has a diamond pattern in two shades of slate blue/gray. The pattern (which could easily be high contrast) in a low contrast color scheme again makes this easier on the eye. And again, I am loving the second version.

Reading blogs and looking online for items to decorate our home my "suspicion" was confirmed again and again. Now I can actually say that I don't hate patterns (as I used to think), I am just not that big of a fan of their strong color scheme versions. I rather love a toned-down version with low contrasting colors, such as beige on white, dark blue on light blue, or black on gray.

 What is your opinion on this? Do you think low-contrast-patterns are boring? Do you agree with my taste? Have you recently discovered something similar with your own tastes? I am curious.

Wednesday, July 20, 2011

And the Dreaming goes on ...

After showing you my dream kitchen last week, I spent some time this weekend and dreamt up the continuation of my kitchen. Considering that I want everything to flow, I used the same paint color and continued a flow of white, black/brown, bamboo, greenish-gray wall-colors and some silver elements.

What do you think of my dining room?

I realized after looking at many many dining-room pictures, that I love the combination of a dark  and even rustic table with white or cream-colored parsons chairs. I also really liked  the dining-rooms that mix up different chairs and different materials. Bamboo? Check! Silver? Check! Dark and light furniture pieces? Check!
So what do you think about my dining room?

Especially when looking at this as a continuation of my hopefully open kitchen, I think I will end up with a very inviting combination of rooms.

Tuesday, July 19, 2011

This week's Freebies: Magazine edition

Here are this week's freebies: I got Martha Stewart Living and Parenting Magazine in the mail. Even though these probably won't help much in reducing our grocery or beauty expenses, they provide some entertainment and fresh ideas.

Monday, July 18, 2011

Addition to the "Baby's Room"

About 5 years ago, previous renters had left behind a hideous little TV stand covered in a weird light pink-grayish laminate. I made do with it, especially since someone in the house (that would be the hubby) told me that painting laminate was impossible.

So the little TV stand moved with us to another apartment and spent the next 2 years in our hardly ever used guest room.

Then we downsized and a few months later I started discovering DIY-blogs and stumbled across Censational Girl's explanation on how to paint laminated furniture. Full of energy and new-found hope I painted the TV stand and another dresser my hubby had collected off the streets. The fresh white color was so much better than the laminate.

I made one mistake though. I polyurethaned the TV stand with a product that warned somewhere in the fineprint it would discolor white paint. Awesome. Since it was in the middle of winter and another painting session with wide-open windows in the freezing cold didn't seem like a goog idea, I decided to live with the yellowish tint that started to show after a few months.

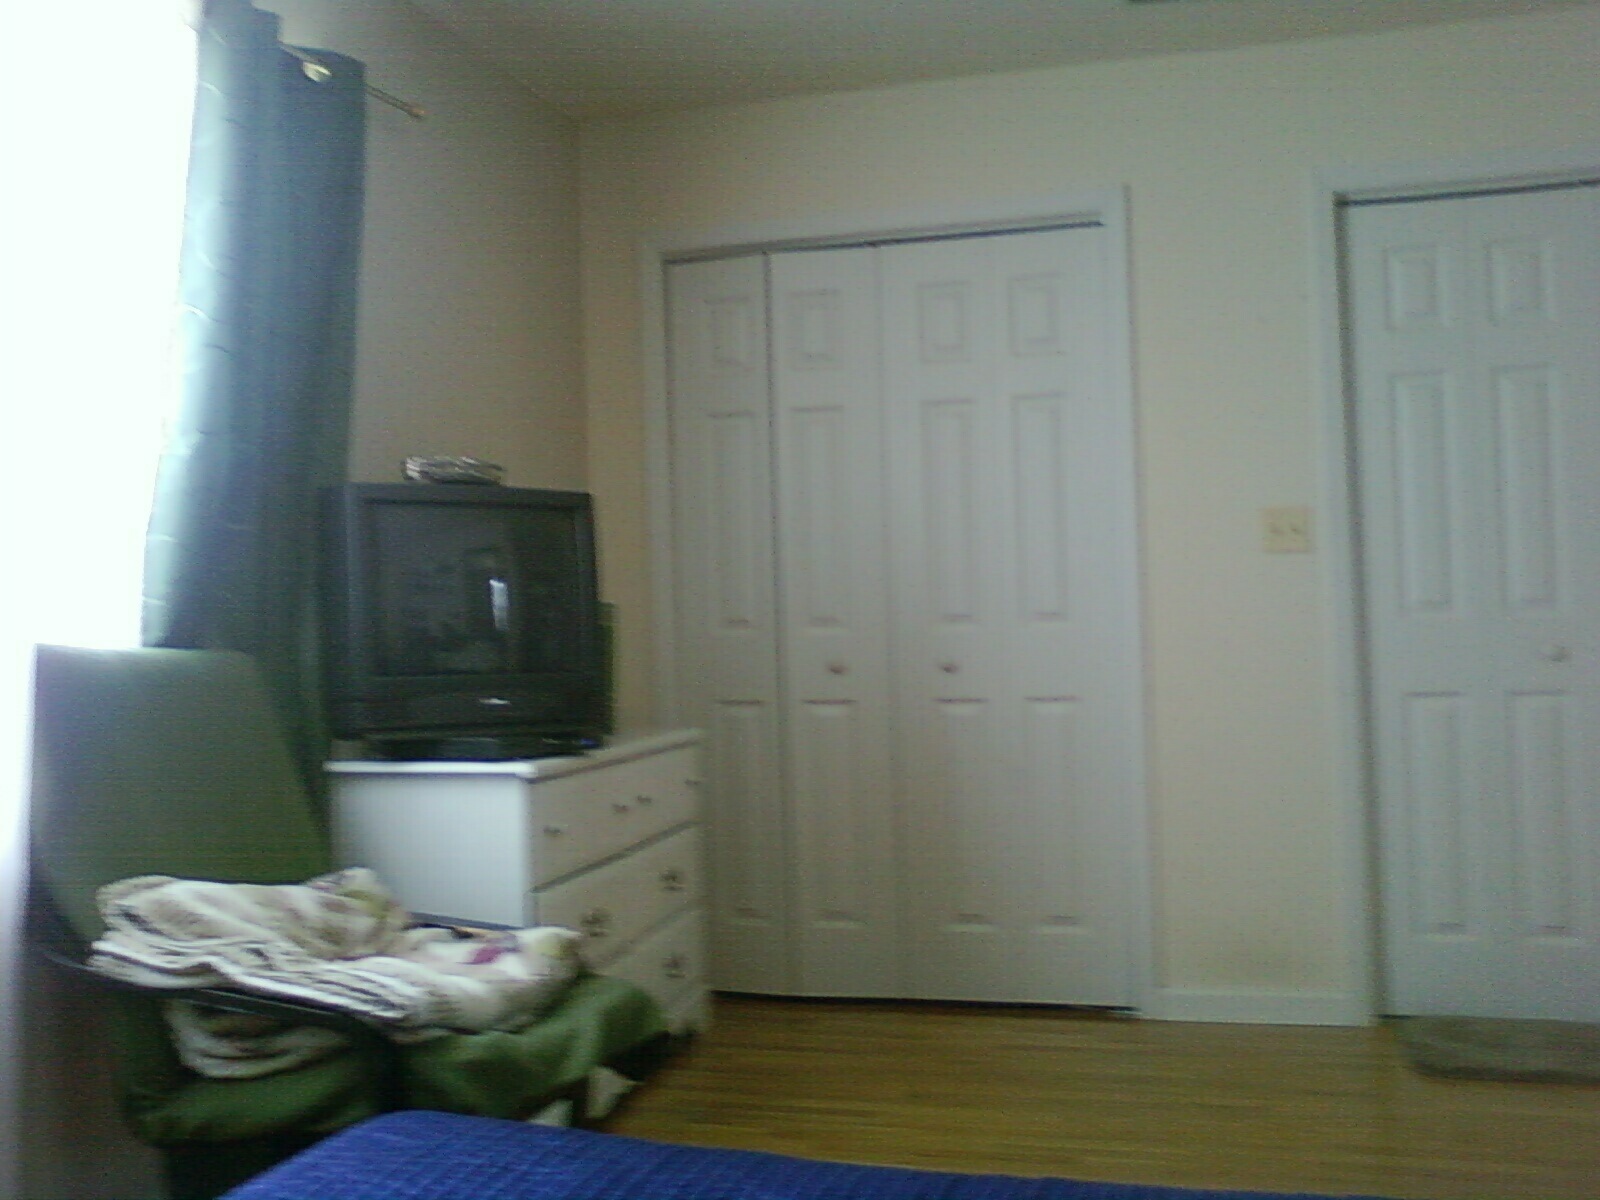
Over the weekend  I decided to tackle the little guy and make it pretty again.


You can't see too well from this picture, but the stand had gotten visibly more yellow over time.
I decided to remove the upper board and to paint whatever was below in white with the intention to use this piece as toy-storage in my son's room.


Here is the stand after I removed the top board. Now it becomes pretty visible how ugly the previous laminate was and how yellow the poly had turned over time.

I decided to use some of my free Glidden paint I got a few months back in order to not only freshen up the white, but also to add a little something else to the stand.
 This color is Glidden's Soothing Green Tea, a fresh but not overpowering green.


After painting the inside corners with a brush, I used a paint roller to cover the entire inside of the stand.


Here is the finished stand (which I had touched-up with white paint). There was one big problem though. I had started the whole project intending to use my leftover primer from last year to cover the circle at the top. Once I opened the can, I had the nice surprise of completely dried out primer. Too bad. The top circle will have to be painted another time or I might even try to make a bench out of this once I pick up a bench cushion and some pretty fabric.

That didn't mean though, that I couldn't dress my stand up a little.

Can you see the light green I added to the open portion of the stand? For decoration I used my son's piggy bank, a place mat (to hide decorate the unpainted portion), a lamp, and one of my son's old receiving blankets framed and hung on the wall.


Then I decided to dress up the bottom portion as well.
 Some company for Mr. Piggy. Isn't this cute?


(After taking the pictures I removed anything not  toddler-friendly for obvious reasons. Also within 10 minutes my son had discovered the new addition to his room and messed up the remainder decoration).


Anyhow, what would you suggest? Adding a little bench seat at the top? Painting that unpainted circle in white? Any other suggestions? Let me know.

Linked up at the following Parties:

Between Naps on the Porch - Metamorphosis Monday
My Uncommon Slice of Suburbia - Tuesdays Treasures 
Domestically Speaking - Power of Paint Party 
Savy Southern Style - Wow us Wednesday 
The Shabby Creek Cottage - Transformation Thursday 
House of Hepworths - Hooking Up 
The Shabby Nest - Frugal Friday

Sunday, July 17, 2011

Meal Plan Sunday - 7/17/2011

Hi there. Here is our Meal Plan for this week. We'll have BBQ at a friend's house today. So besides a little something to bring there won't be any cooking today.

Enjoy your Sunday everyone!
Tomorrow I will share a cheery, little furniture re-do that I worked on over the weekend.
I also added a page, (which is still in-process) to the blog which shows pictures of my apartment. So feel free to take a look at my progress.

Friday, July 15, 2011

Caramelly Goodness

Here is an easy recipe for caramel pudding I learned from one of my Brazilian friends.

All you need is the following:
  • 1 can sweetened condensed milk
  • 1 can regular milk
  • 1 can corn
  • 3 eggs
  • sugar
 1) Preheat oven to 400F. Then start by adding about 10 tablespoons of sugar to a saucepan and heat (stirring constantly) until sugar is caramelized.

2) Pour sugar in baking form (the only form I have is the one above, but better would be a wreath-shaped cake form)
3) Now add sweetened condensed milk, regular milk, corn and eggs to a mixer and mix very well.
4) Now pour mix over caramelized sugar.
5) Bake this in the oven for about 35 to 40 minutes.

6) Let cool for a bit, cut out the "corners" and turn flan over onto a plate. Now hope that the whole thing doesn't fall apart.
7) You can pour more caramelized sugar over the flan to make it look nicer, and then enjoy this sweet treat garnished with strawberries and blueberries :)

Thursday, July 14, 2011

Our Apartment

Sometime this week I am planning to post a page showing our apartment. Since I am still working on getting that post together I thought I would quickly post a layout of the apartment to make things easier for the picture post.

I used a great planner that you can find online and use for free in order to map out a room's layout.

You can register at Floorplanner and then start planning the use of furniture in your own house or apartment or even dream up a dream home.

The use of the site is pretty straight forward and easy to learn.

Here is our apartment:

My measurements are a little bit off, but I think this shows pretty good that our apartment is very narrow and that there isn't much space to work with. We do have some furniture overload and a bunch of furniture pieces that are too big for the rooms, but that is due to the fact that we downsized in order to be able to save up for a down payment.

You enter the apartment right into the living room, and the door literally swings directly into the sofa. It's a close fit. Turning right, there is a small area that fits a dining-room set and around the corner is our kitchen which has its own set of flaws. Between the dining-room and kitchen is a hallway down to the bedrooms.

First door on the right houses a tiny laundry room. Then to the left is the door to the first small bedroom, in which my brother-in-law lives. Then the second door to the right opens up to the guest bathroom, and the second door to the left goes to my son's bedroom. Finally at the end of the hallway there is a door to the master bedroom with on-suite bathroom.


We actually used to live in a much larger apartment, but ultimately decided to downsize in order to be able to save some money for a down-payment. With this move we cut about 1/3 off our monthly rent-bill and with our brother-in-law paying for his room, rent was reduced even further. Now we are more at 1/2 of our previous rent amount.

Pictures will follow soon, so come back to get a glimpse at our little apartment.